How To: Add a Custom Domain to Azure API Management for Free
By using a free TLS certificate from Let’s Encrypt, we can configure a secure, custom domain for Azure API Management.
Azure API Management is a great way to add a layer of indirection between your API clients and your backend, allowing you to control how requests are fulfilled without having to change your public API endpoint or complicate your backend services. Also, since it is available on a consumption plan and the first million requests a month are free, adding Azure API Management to low volume endpoints can be done at no cost. #AzureForFree
The Azure API Management consumption plan supports one custom domain, but you need to supply a SSL/TLS certificate for that domain to host HTTPS endpoints. Certificates as provided by Azure cost $70 (standard cert) to $300 (wildcard cert) a year, but thankfully we can get a free certificate from Let’s Encrypt.
Requirements:
- An Azure subscription
- A domain
We’ll cover:
- How to create a wildcard SSL/TLS certificate for your custom domain from Let’s Encrypt using the Windows Subsystem for Linux (WSL2:Ubuntu) on Windows 10. We’ll use certbot in manual mode with DNS verification.
- How to use OpenSSL to export the certificate as a PFX file
- How to add the certificate PFX to Azure Key Vault
- How to use the certificate and configure a custom domain for Azure API Management
- How to renew your certificate (coming soon)
Creating the SSL/TLS certificate
Because we don’t have access to web server hosting the domain for which we want the certificate issued, manual mode with a DNS challenge is the most accessible method of getting the certificate.
Installing certbot
Certbot is the application that will take us through creating the certificate and verifying that we have met the challenge criteria. I followed the instructions here to install certbot on WSL2 for Windows running Ubuntu. If you need to set or change the root user password for your sudo commands, run sudo passwd (there are more details here). Since we’ll need openssl to export the certificate later, we’ll install that now, too.
Installing certbot and openssl
sudo apt-get update
sudo apt-get install software-properties-common
sudo add-apt-repository universe
sudo add-apt-repository ppa:certbot/certbot
sudo apt-get update
sudo apt-get install certbot
sudo apt-get install openssl
Creating the certificate
certbot is an interactive tool, meaning if you run it with few parameters it will take you though an interactive series of prompts. However, I find it easier to provide all the required information up front.
sudo certbot certonly --manual -d '<yourdomain>,*.<yourdomain>' --agree-tos --manual-public-ip-logging-ok --preferred-challenges dns-01 --server https://acme-v02.api.letsencrypt.org/directory
Replace <yourdomain> with your top-level domain name (ex: randomfact.com). For each domain parameter listed (two in this case) you will be prompted to create a DNS TXT record that certbot will use to verify your control of the domain. You may press <enter> the first time, so that you know both TXT records you need to create, but if you press <enter> the second time, it proceeds with the verification and you need to be ready.
Here is an example of the output:
Performing the following challenges:
dns-01 challenge for randomfact.com
dns-01 challenge for randomfact.com

- - - - - - - - - - - - - - - - - - - - - - - - - - - - - - - - - - - - - - - -
Please deploy a DNS TXT record under the name
_acme-challenge.randomfact.com with the following value:

0GG4Dqkk_x9Ga9DcVkxlcAkfqiQqfzakTPRHS17qUlA

Before continuing, verify the record is deployed.
- - - - - - - - - - - - - - - - - - - - - - - - - - - - - - - - - - - - - - - -
Press Enter to Continue

- - - - - - - - - - - - - - - - - - - - - - - - - - - - - - - - - - - - - - - -
Please deploy a DNS TXT record under the name
_acme-challenge.randomfact.com with the following value:

FaFFpWyk5i8kH0RK6AtDiZnOLCBulGj2uGv_J-18th4

Before continuing, verify the record is deployed.
(This must be set up in addition to the previous challenges; do not remove,
replace, or undo the previous challenge tasks yet. Note that you might be
asked to create multiple distinct TXT records with the same name. This is
permitted by DNS standards.)

- - - - - - - - - - - - - - - - - - - - - - - - - - - - - - - - - - - - - - - -
Press Enter to Continue
Creating the TXT records
At this point you have the details needed to satisfy the challenge by adding to the DNS record for your domain. In my case, I use namecheap.com. In namecheap, from the “Advanced DNS” tab click “Add New Record” and make it is a record of type TXT. In the end, you should have two entries that look something like this:

Verifying the TXT records exist
In another WSL prompt, you can run DiG to verify that the records have been created and are available to certbot.
dig _acme-challenge.<yourdomain> TXT
If they are there, you should see an “ANSWER SECTION” in the output, something like this:
; <<>> DiG 9.11.3-1ubuntu1.12-Ubuntu <<>> _acme-challenge.randomfact.com TXT
;; global options: +cmd
;; Got answer:
;; ->>HEADER<<- opcode: QUERY, status: NOERROR, id: 61785
;; flags: qr rd ad; QUERY: 1, ANSWER: 2, AUTHORITY: 0, ADDITIONAL: 0
;; WARNING: recursion requested but not available

;; QUESTION SECTION:
;_acme-challenge.randomfact.com.        IN      TXT

;; ANSWER SECTION:
_acme-challenge.randomfact.com. 0 IN    TXT     "0GG4Dqkk_x9Ga9DcVkxlcAkfqiQqfzakTPRHS17qUlA"
_acme-challenge.randomfact.com. 0 IN    TXT     "FaFFpWyk5i8kH0RK6AtDiZnOLCBulGj2uGv_J-18th4"
You can also use a web tool such as the mxtoolbox as shown:
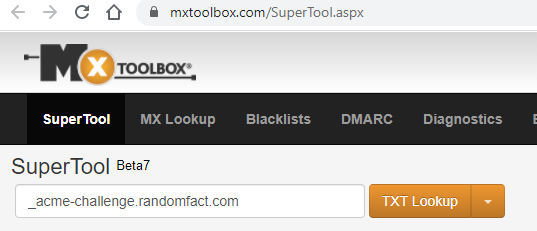
Once the TXT records are in place, you can continue with certbot.
Completing the certificate challenge
Now that the TXT records are in place, go back to certbot and press <enter>; you should get output as follows:
Waiting for verification...
Cleaning up challenges

IMPORTANT NOTES:
 - Congratulations! Your certificate and chain have been saved at:
   /etc/letsencrypt/live/randomfact.com/fullchain.pem
   Your key file has been saved at:
   /etc/letsencrypt/live/randomfact.com/privkey.pem
Congratulations indeed! Now the last step is to export the cert to a .pfx file that you can load into Azure KeyVault.
Exporting the certificate
Run openssl to export the pfx file. You will be prompted to provide a certificate password. Remember this password, as you’ll need it to upload the certificate to keyvault.
sudo openssl pkcs12 -export -out key.pfx -inkey /etc/letsencrypt/live/<yourdomain>/privkey.pem -in /etc/letsencrypt/live/<yourdomain>/fullchain.pem
This creates a “key.pfx” file in your working folder. If you’re not already in a friendly windows path, you may want to copy the key file to your Windows user folder (for me this path is referenced by the OLDPWD environment variable):
cp key.pfx $OLDPWD
Back in Windows, you can now find this file in the %userprofile% folder.
Adding the certificate to Key Vault
Azure Key Vault is another low-cost service, with a standard/consumption plan cost at $0.03/10,000 transactions. Adding the certificate is easy:
- From KeyVault in the Azure Portal, select Certificates on the left
- Select Generate/Import
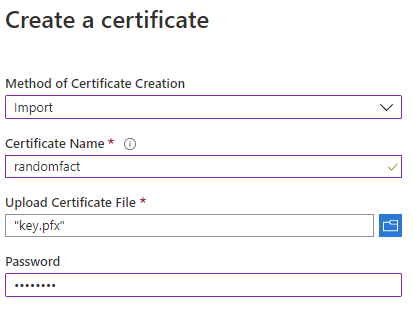
- Change the top dropdown from “Generate” to “Import”
- Give your certificate a name (such as the name of your domain)
- Select the key.pfx file from the %userprofile% folder
- Enter the password used when you exported the certificate
Importing your certificate should look something like this:
Configuring a custom domain in Azure API Management
For this last step, we need to create the CNAME record to point to your Azure API Management endpoint, and we need to configure the custom domain and certificate within Azure API Management. Details can be found in the Azure documentation.
Creating the CNAME record
You need to create a CNAME DNS record within your domain provider; at namecheap this is done in the same “Advanced DNS” you used to create the TXT records for your certbot verification.

Configuring the custom domain in Azure API Management
- Within API Management, under “Deployment and infrastructure”, click “Custom domains”
- Select “Add”
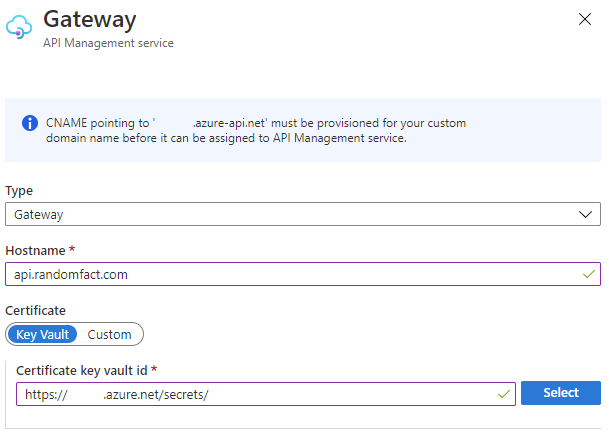
- Specify the Hostname you want to use for accessing your API within the custom domain
- Specify the certificate you just added to Key Vault.
Below is an example of specifying the host name and certificate for Azure API Management
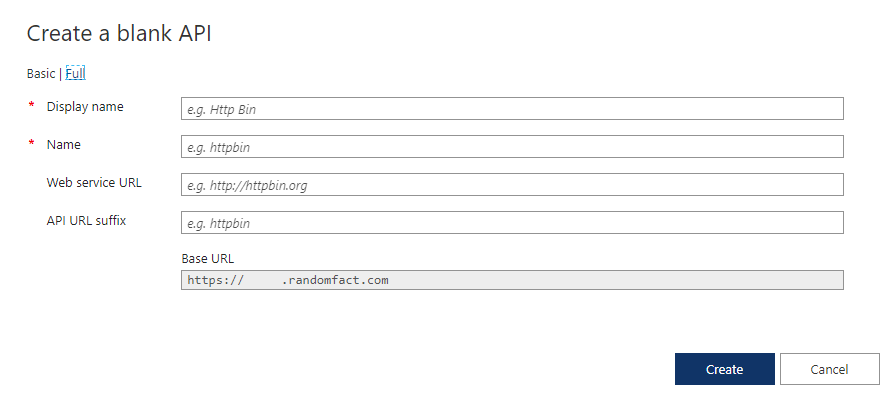
Creating your API
With the custom domain configured in Azure API Management, you can create an API; notice the base URL is what you configured as your custom domain:
When accessed via HTTPS, your certificate will be used to secure the connection. Congratulations!
Comments